Let’s be real — most of us love soft sandwich bread, but the thought of baking it at home feels like a science project, right? I used to think the same.
Then one day, I had a few extra hours and some sourdough starter sitting in the fridge.
I decided to try making my own sandwich loaf — and wow, it changed everything.
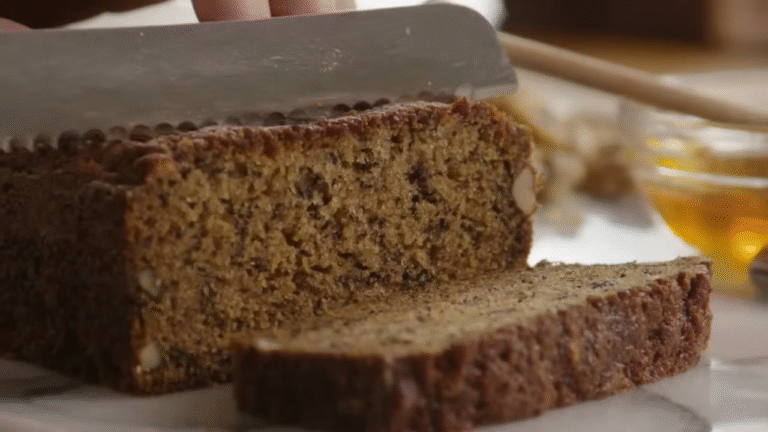
This sourdough sandwich bread is soft, slightly tangy, and beautifully golden, perfect for toast or sandwiches.
If you’ve struggled with hard crusts or heavy loaves before, this one will win your heart. I promise — once you make it, store-bought bread will never taste the same again.
What Makes Sourdough Sandwich Bread Special
This bread isn’t just “bread.” It’s a little bit of magic.
Unlike regular sandwich bread made with instant yeast, sourdough relies on a natural starter — a bubbly mix of flour and water full of wild yeast and good bacteria. This gives your loaf:
- A light tangy flavor that’s totally natural.
- A softer, more flavorful crumb.
- Better digestibility, thanks to slow fermentation.
And the best part? No weird preservatives. Just flour, water, salt, and a touch of butter or oil. Real ingredients for real flavor.
Ingredients You’ll Need
Here’s what you’ll need to make your sourdough sandwich bread:
- 1 cup active sourdough starter (fed and bubbly)
- 1 ¼ cups warm water
- 3 tablespoons butter or oil
- 1 tablespoon sugar or honey
- 1 ½ teaspoons salt
- 3 ½ to 4 cups bread flour
That’s it! You don’t need anything fancy — just simple pantry ingredients and a bit of patience.
Step-by-Step: How to Make Sourdough Sandwich Bread
Step 1: Mix the Dough
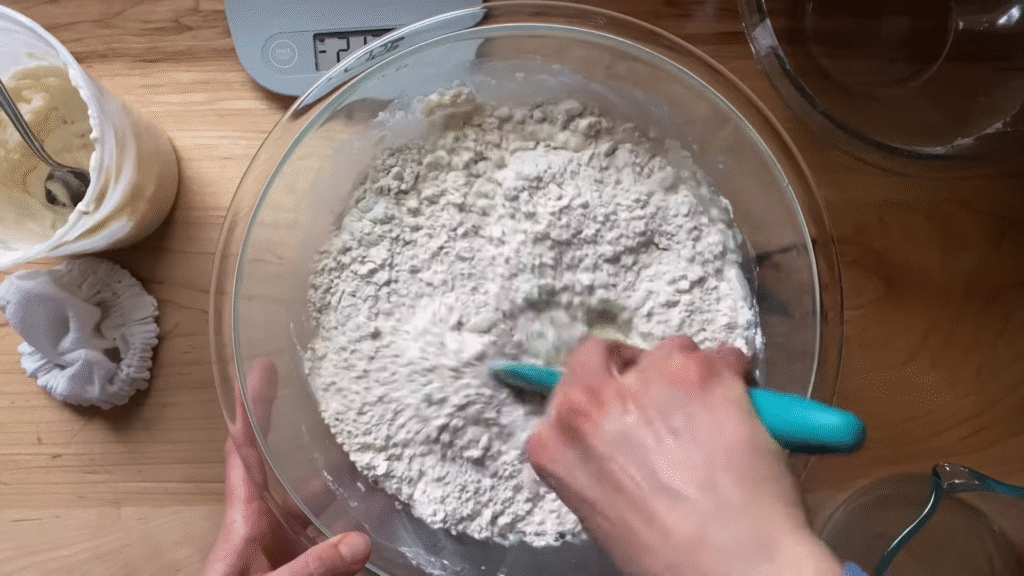
In a large bowl, mix your starter, warm water, and sweetener (sugar or honey). Stir until the starter dissolves. Add your flour and salt, and stir until a sticky dough forms.
If it looks rough and shaggy — good. That’s exactly what we want. Cover it with a towel and let it rest for 30 minutes. This short break helps the flour absorb the water and makes kneading easier later.
Step 2: Knead Until Smooth
After resting, add your butter or oil and start kneading. You can do this by hand for about 10 minutes or use a mixer for about 5 minutes.
The dough should become smooth and stretchy, but not sticky. If it feels too wet, sprinkle a bit of flour — just enough to handle it comfortably.
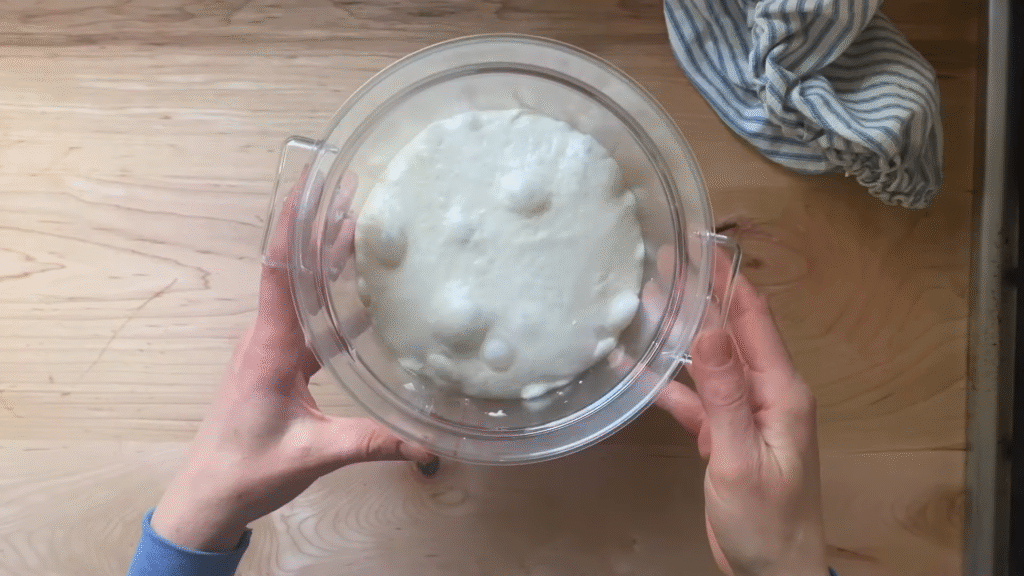
Step 3: The Long Fermentation (First Rise)
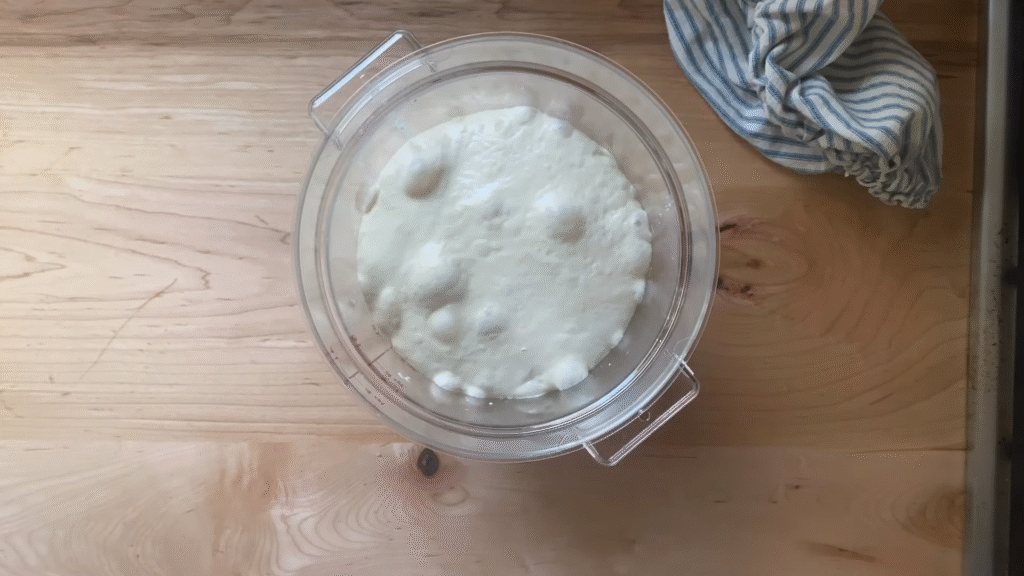
Now, it’s time to let the dough rest and rise. Place it in a lightly greased bowl, cover it, and let it rise at room temperature for 4–6 hours, or until it doubles in size.
Tip: If your kitchen is cool, you can let it rise overnight in the fridge. This slow fermentation gives the bread that deep sourdough flavor we all love.
Step 4: Shape the Loaf
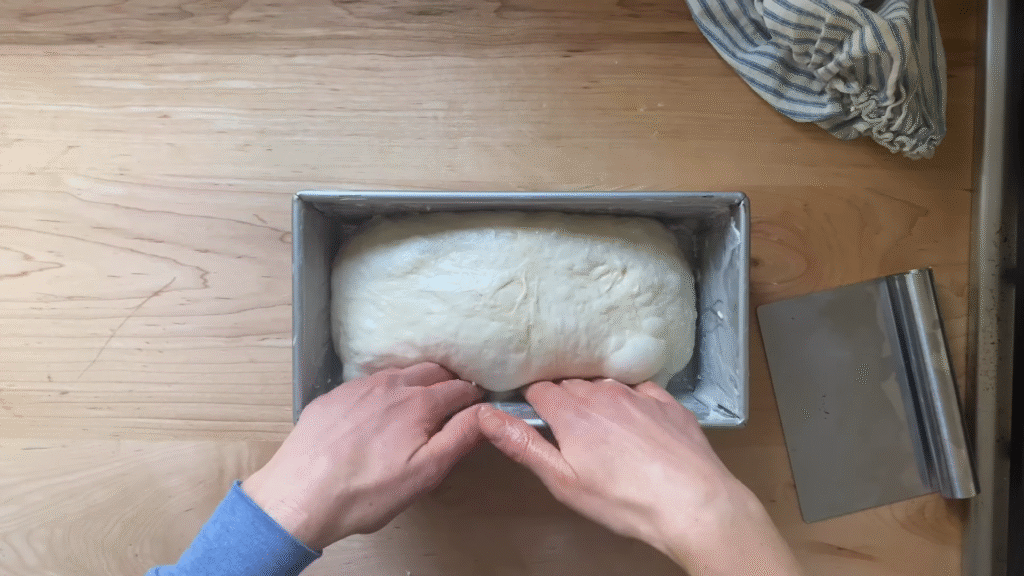
Once it’s puffy and airy, gently punch it down to release any large bubbles. Turn it onto a floured surface and shape it into a log.
Place it into a greased loaf pan (8×4 or 9×5 inches). Cover loosely with a towel and let it rest again until it rises just above the rim — about 1 to 2 hours (longer if your kitchen is cool).
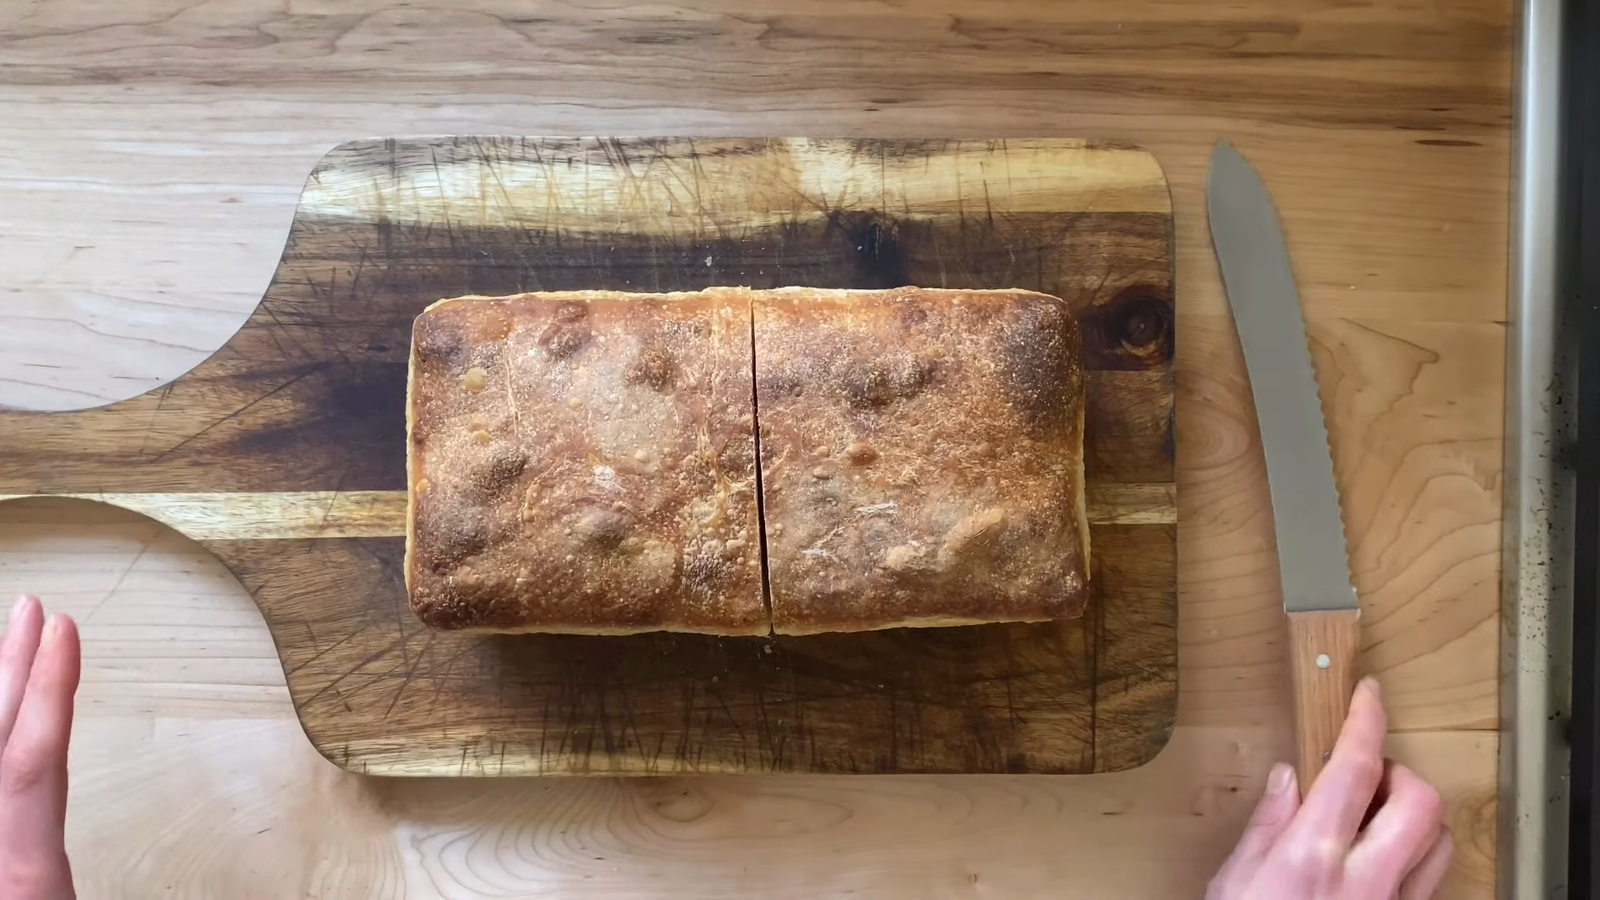
Step 5: Bake to Perfection
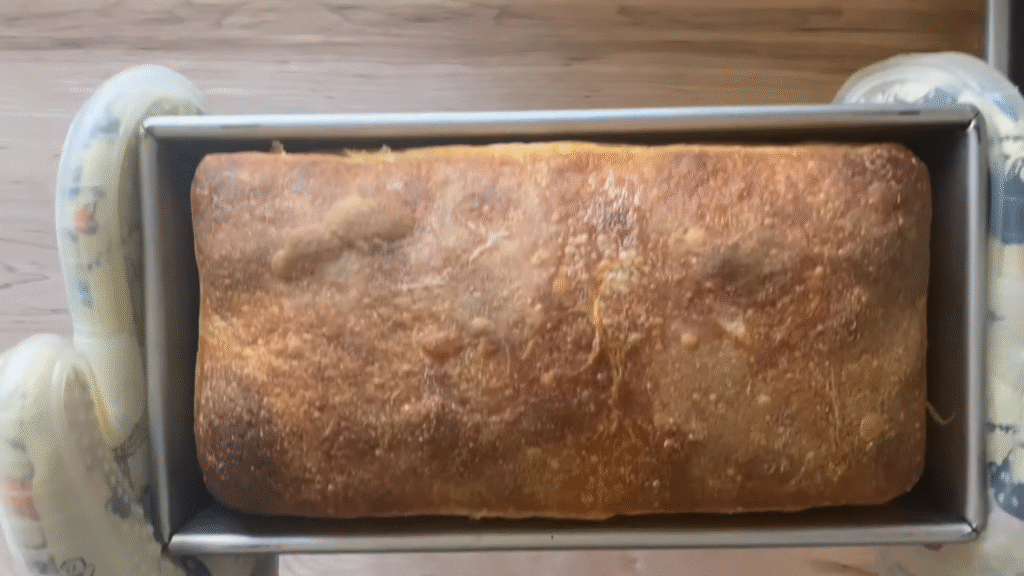
Preheat your oven to 375°F (190°C). Bake the bread for 35–40 minutes, until the top is golden brown and the bottom sounds hollow when tapped.
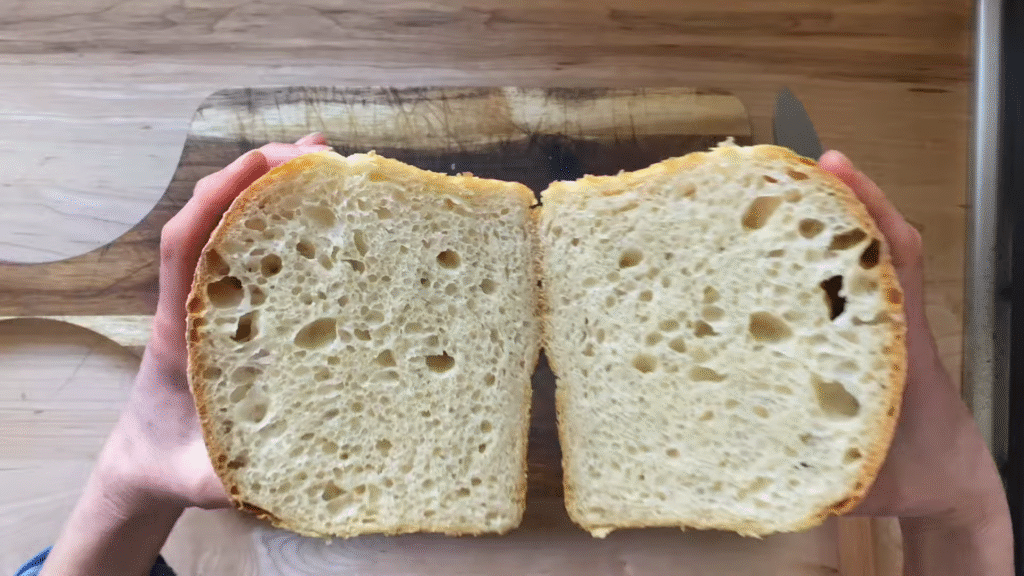
Let it cool completely before slicing. I know, waiting is hard — but cutting too soon can make your bread gummy inside.
Tips for Perfect Sourdough Sandwich Bread
1. Use a Happy Starter
Make sure your sourdough starter is active and bubbly before you start. If it’s sluggish, feed it and wait 4–6 hours. A strong starter means a better rise and lighter texture.
2. Don’t Rush the Rise
Sourdough takes its sweet time. Be patient — the longer the rise, the better the flavor. Watch the dough, not the clock.
3. Store It Right
Once cooled, store your bread in a cloth bag or airtight container. It’ll stay soft for 3–4 days, or you can slice and freeze it for weeks.
4. Add Your Twist
Want to get creative? Add seeds, herbs, or a swirl of cinnamon sugar before baking. The base recipe is flexible — make it your own.
Why You’ll Love This Bread
This sourdough sandwich bread is:

- Soft and fluffy, not dense or chewy.
- Mildly tangy, just enough to make it interesting.
- Perfect for sandwiches, toast, or even French toast.
- Freezer-friendly, so you can always have homemade bread on hand.
Every slice feels like a little reward for your patience — warm, wholesome, and full of flavor.
Common Mistakes (And How to Avoid Them)
- Dense bread? Your starter wasn’t active enough. Feed it well next time.
- Flat loaf? You might’ve over-proofed (let it rise too long). Next time, bake when it’s just slightly above the pan’s edge.
- Tough crust? Cover your loaf with a towel as it cools to soften the crust.
These tiny tweaks can make a huge difference.
Serving Ideas
Here’s how I love to use this bread:
- Classic grilled cheese — melty and golden!
- Avocado toast with chili flakes and olive oil.
- Breakfast toast with peanut butter and banana slices.
- Chicken or egg salad sandwiches — soft bread, creamy filling, perfection.
Honestly, it’s good with almost anything.
FAQs About Sourdough Sandwich Bread
Q1: Can I use whole wheat flour?
Yes, you can swap up to 50% of the bread flour with whole wheat. It’ll make your loaf heartier and more flavorful.
Q2: My bread didn’t rise much. Why?
Your starter might not have been active enough, or your kitchen was too cold. Give it more time to rise — sourdough loves patience.
Q3: Can I make it dairy-free?
Absolutely. Use olive oil or coconut oil instead of butter. The bread will still turn out soft and tasty.
Q4: How long can I keep it?
It stays fresh for up to 4 days at room temperature, a week in the fridge, or up to 2 months in the freezer.
Q5: Can I make this in a bread machine?
Yes! Just use the “dough” setting for mixing and rising, then shape it by hand and bake in your oven for best texture.
Final Thoughts
Making sourdough sandwich bread at home isn’t complicated — it just takes a little love and time. Once you taste that warm, soft slice fresh from your own oven, you’ll wonder why you ever bought bread before.
So grab your starter, roll up your sleeves, and bake your first loaf — your sandwiches will thank you!