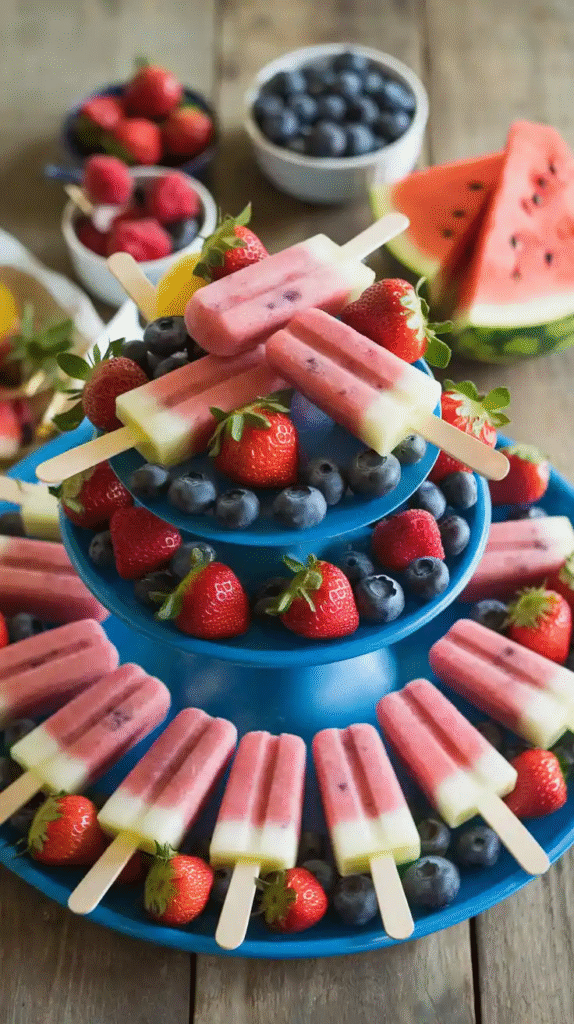
When the summer heat hits like a punch in the face, nothing cools you down faster than an icy, juicy fruit popsicle. But most store-bought options are loaded with added sugars, artificial dyes, and things you can’t even pronounce. Why not make your own instead?
These homemade fruit popsicles are not just refreshing—they’re packed with real fruit, naturally sweet, and you can whip them up faster than your kid can scream “I’m bored!” during summer break. In just 25 minutes (plus freeze time), you’ll have a freezer full of healthy, vibrant pops that even the pickiest eaters will chase after.
Why Make Homemade Fruit Popsicles?
Store-bought popsicles can be sneaky villains. They look fruity, but many are actually more like frozen corn syrup sticks with a hint of “natural flavor.” Here’s what you’re really saving yourself from when you make them at home:
- Artificial sweeteners and colors found in many commercial brands have been linked to hyperactivity in kids.
- Added sugars are a huge health concern—according to the CDC, over 60% of children consume more added sugar than recommended.
- Making your own gives you full control over ingredients, flavors, and texture—plus it saves money long-term.
And here’s the real win: You’ll get your kids to eat more fruit without even trying. That’s parenting wizardry right there.
Essential Equipment You’ll Need
Before you begin, make sure you have a few kitchen tools ready:
- Blender or food processor – for pureeing fruits.
- Popsicle molds – reusable silicone or BPA-free plastic ones work best.
- Popsicle sticks – wooden sticks give that classic ice pop feel.
- Freezer space – obvious, but important.
- Optional: Measuring cups, funnels, or squeeze bottles for easy pouring.
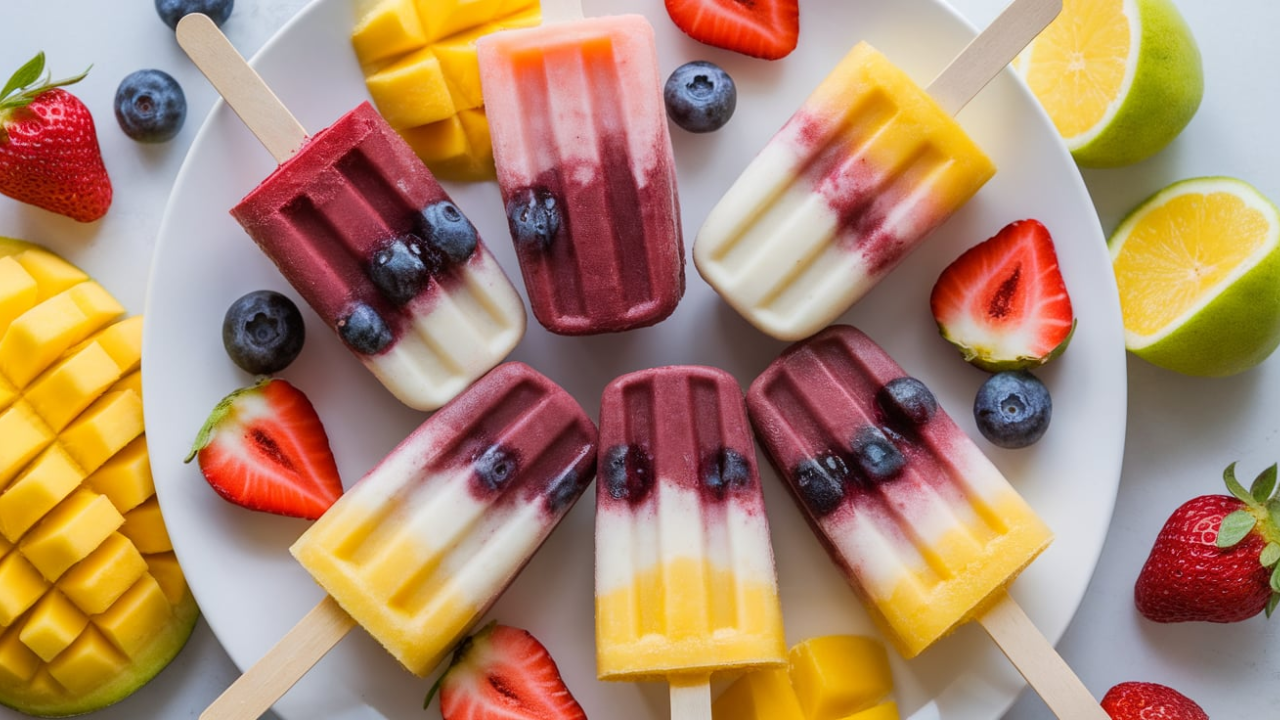
Choosing the Right Fruit: Best Options for Popsicles
Not all fruits freeze the same. Some turn icy and bland. Others stay creamy and bright. Here are a few top picks:
Fruits That Freeze Well:
- Berries (strawberries, blueberries, raspberries)
- Mango
- Peach
- Pineapple
- Kiwi
- Watermelon
- Banana
- Cherries
Fruits to Use Carefully:
- Citrus fruits (better as juice, not chunks)
- Apples or pears (tend to brown and get grainy unless cooked first)
- Melons like cantaloupe (high water content, can get icy)
My go-to combo for kids? Strawberry, banana, and mango. It’s like the holy trinity of kid-friendly flavors.
Base Liquid Options: What to Use Instead of Sugar Water
Your fruit mixture needs a little help flowing into the molds, and that’s where liquids come in. The choice of base affects taste, texture, and nutrition.
Smart Base Liquids:
- Coconut water – light, refreshing, naturally sweet.
- Fruit juice (100% pure) – orange, pineapple, apple.
- Greek yogurt – creamy texture, protein boost.
- Milk or plant-based milk – oat, almond, or soy milk.
- Pureed fruit – thick and rich without added liquid.
Avoid sugary sodas, sports drinks, or anything with high-fructose corn syrup. We’re keeping this clean.
How to Sweeten Naturally (If Needed)
Ripe fruit is sweet enough, but if you’re working with tart berries or not-so-ripe fruit, here’s how to give it a gentle sweet nudge:
- Honey – great with lemon or yogurt-based pops.
- Maple syrup – works well with tropical fruits.
- Agave nectar – neutral flavor, good for blending.
- Medjool dates – blend with base for fiber and caramel notes.
- Stevia or monk fruit – zero-calorie options for adults.
Tip: Always taste your fruit mixture before freezing. If it’s not sweet enough now, it’ll taste even duller once frozen.
Step-by-Step Guide: How to Make Homemade Fruit Popsicles
Let’s get into the juicy part—making your popsicles.
Ingredients (Basic Version – Makes 8 Pops):
- 2 cups fresh strawberries (hulled)
- 1 ripe banana
- 1/2 cup mango chunks (fresh or frozen)
- 1/2 cup coconut water or orange juice
- 1–2 tbsp honey or maple syrup (optional)
Instructions:
- Wash and prep fruit. If using frozen fruit, let it thaw a bit for easier blending.
- Add to blender: Combine all fruits and base liquid.
- Blend until smooth. No chunks, unless you like a bit of texture.
- Taste and adjust sweetness or thickness.
- Pour into molds. Leave 1/4″ space at top for expansion.
- Insert sticks and freeze for 4–6 hours or until solid.
- To remove, run mold under warm water for a few seconds.
Done. You now have homemade popsicles that look and taste better than anything at the store.
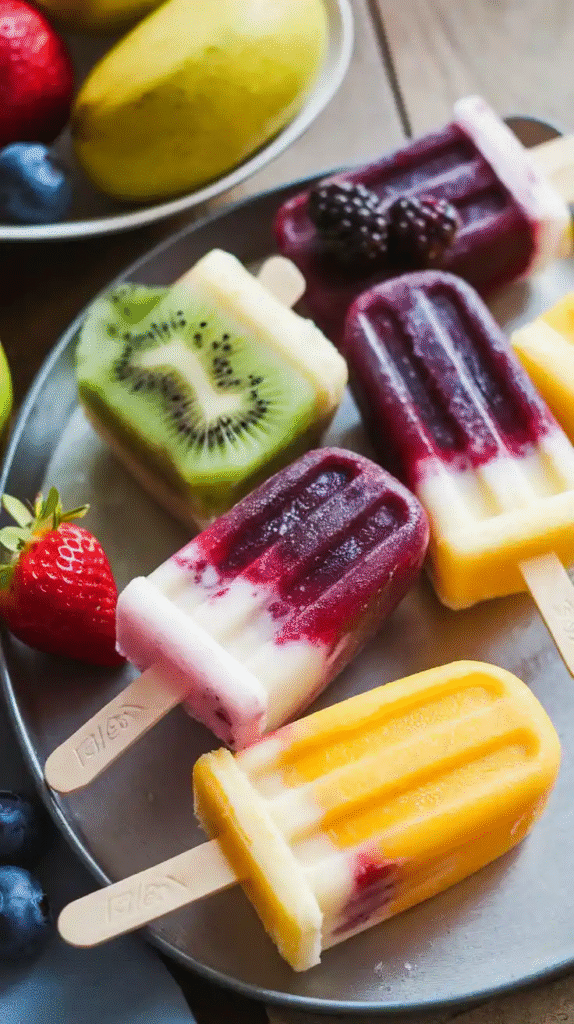
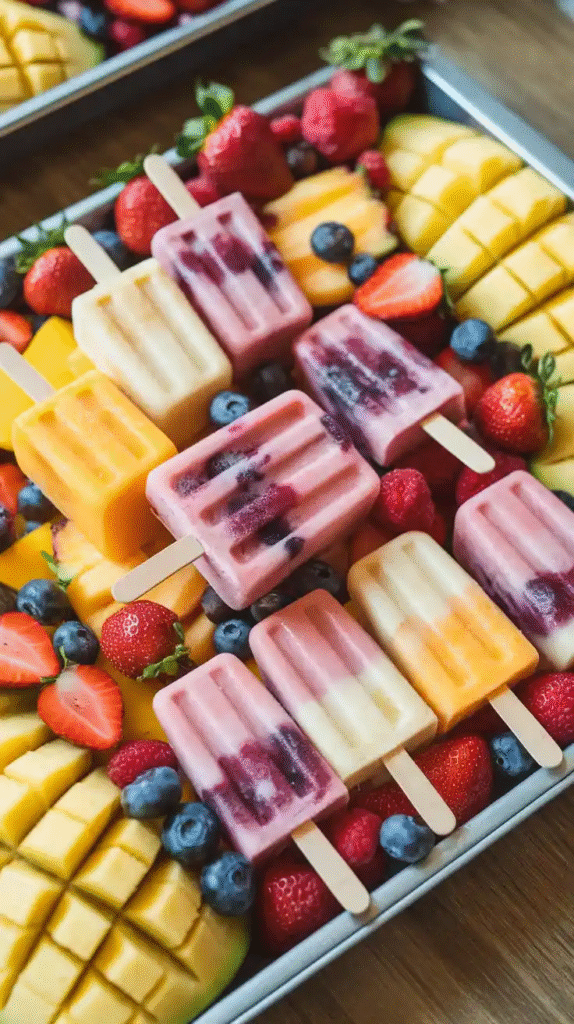
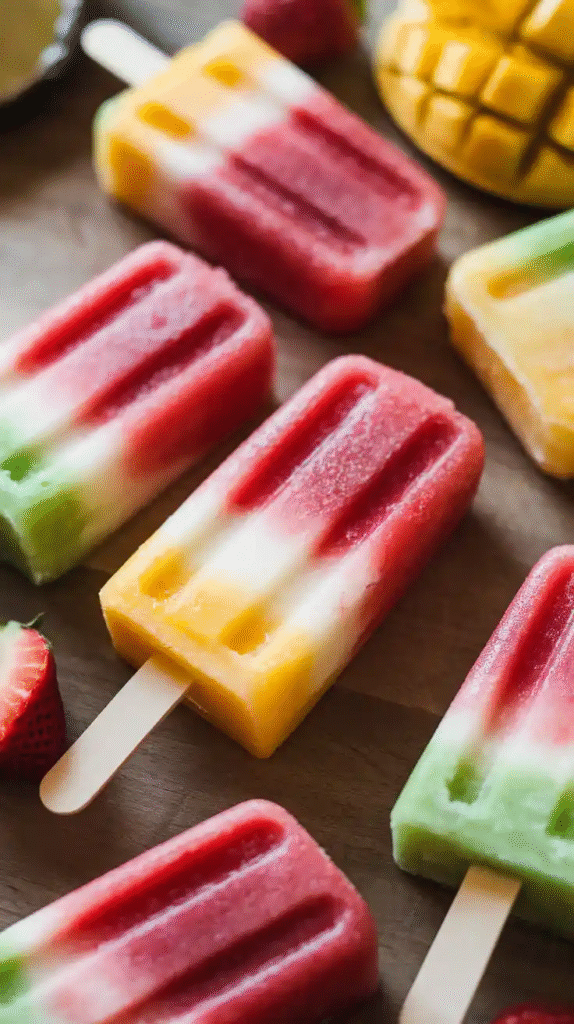
5 Favorite Flavor Combos You Should Try
Let’s get creative. Here are five tried-and-true recipes you can rotate all summer.
1. Berry Lemonade Blast
- 1 cup strawberries
- 1/2 cup blueberries
- Juice of 1 lemon
- 1/2 cup apple juice
- Optional: sweeten with honey
This one’s tangy, bright, and beautiful—like a fireworks show in your mouth.
2. Tropical Sunrise
- 1 banana
- 1/2 cup mango
- 1/2 cup pineapple
- 1/2 cup coconut milk
Creamy, dreamy, and beachy. Add toasted coconut flakes for crunch.
3. Creamy Peaches & Yogurt
- 1 cup ripe peach slices
- 3/4 cup vanilla Greek yogurt
- Dash of cinnamon
Feels like peach cobbler turned frozen treat.
4. Chocolate Banana Fudge
- 2 ripe bananas
- 2 tbsp cocoa powder
- 1/2 cup oat milk
- 1 tbsp maple syrup
For those moments when fruit isn’t enough. This one’s rich, like a frozen chocolate banana smoothie.
5. Watermelon Mint Cooler
- 2 cups watermelon chunks
- 1 tsp chopped fresh mint
- Juice of 1 lime
- Optional: dash of honey
This one’s a poolside favorite. Mint makes it fancy, but your kids won’t notice—they’ll just ask for more.
How to Involve Kids in the Popsicle Process
Want a boredom buster that actually ends in snacks? Let your kids join in. Here’s how:
- Let them choose fruits at the store or farmer’s market.
- Have them layer colors for striped pops.
- Teach measurements with cups and spoons.
- Name the popsicles—you’ll end up with things like “Princess Rainbow” or “Dino Ice Blaster.”
Kids love the feeling of ownership, and they’re more likely to eat something they helped create.
Storage Tips: Keeping Your Popsicles Perfect
Once frozen, you can pop the treats out and store them in airtight containers or freezer bags. This frees up your molds for more batches.
Tips:
- Store with parchment paper between each to prevent sticking.
- Eat within 2–3 weeks for best flavor and texture.
- Label with the flavor and date so you don’t end up with mystery pops.
Nutrition Info: Health Benefits in Every Bite
Let’s break down the nutritional value of homemade popsicles:
| Nutrient | Value (per pop, avg.) |
|---|---|
| Calories | 40–80 |
| Sugar | 6–12g (from fruit) |
| Fiber | 1–2g |
| Vitamin C | 25–40% DV |
| Antioxidants | High (esp. berries) |
| Artificial Additives | 0 |
Compare that to store-bought, where one stick can have 20g+ of added sugar and food dyes linked to behavioral issues.
Budget Comparison: Homemade vs Store-Bought
Let’s do some math. A box of 6 quality fruit pops can cost $5–7. That’s over $1 per pop.
With homemade:
- 1 lb strawberries = $2
- 2 bananas = $0.50
- 1 mango = $1
- Coconut water = $1.50
You’re making 8–10 pops for under $5—and getting a healthier snack to boot.
Real-Life Story: The Popsicle That Saved the Day
Last July, during a neighborhood playdate, my freezer went rogue and stopped working. I had 12 freshly frozen fruit pops in there—my backup plan for the cranky post-nap chaos. Thankfully, I noticed in time and rushed them to the neighbor’s deep freezer. That batch? It saved my sanity. The kids licked every one clean, and the moms asked for the recipe. That’s when I knew: homemade popsicles were here to stay.
Common Mistakes and How to Avoid Them
Even a simple recipe can trip you up if you’re not careful. Here’s what to watch for:
- Too icy? Use less water, more fruit or a creamy base.
- Too soft? Avoid melons with high water content.
- Stuck in the mold? Don’t yank. Run warm water around the outside.
- Flavor too weak? Use concentrated juices or reduce added liquid.
Final Tips for Popsicle Perfection
- Taste before freezing – flavors dull slightly when frozen.
- Layering? Freeze in stages – each layer needs 20 minutes before adding the next.
- Add-ins like chia seeds or chopped nuts for fun texture.
- Experiment—this is one of the few recipes where mistakes still taste good.
Conclusion: Your Freezer Deserves a Batch of These
When it comes to easy, healthy, and satisfying summer snacks, homemade fruit popsicles check every box. They’re simple enough to whip up on a lazy afternoon, customizable to every tastebud in your house, and they turn snack time into something you look forward to too.
With just a few ingredients and a little prep, you can give your family something cool, clean, and full of flavor—without turning on the oven or reaching for junk.
Now go open that fruit drawer, grab your blender, and let your popsicle journey begin. You’ve got this—and your kids will think you’re a summer superhero.