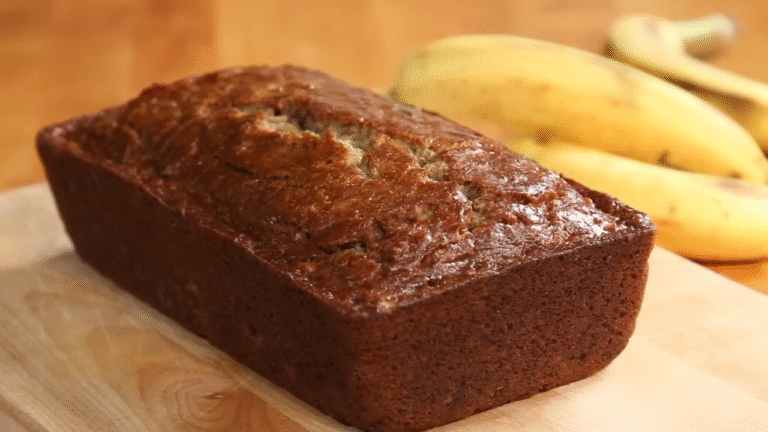
You know that smell when fresh bread comes out of the oven? Yeah, that golden, cozy aroma that makes you want to eat the whole loaf right there.
That’s exactly how I fell in love with Dutch oven bread — it’s ridiculously simple, but it feels like something from a fancy bakery.
I came up with this recipe after ruining more loaves than I can count (don’t worry, I learned from every one of them). Once I got it right, though? Wow.
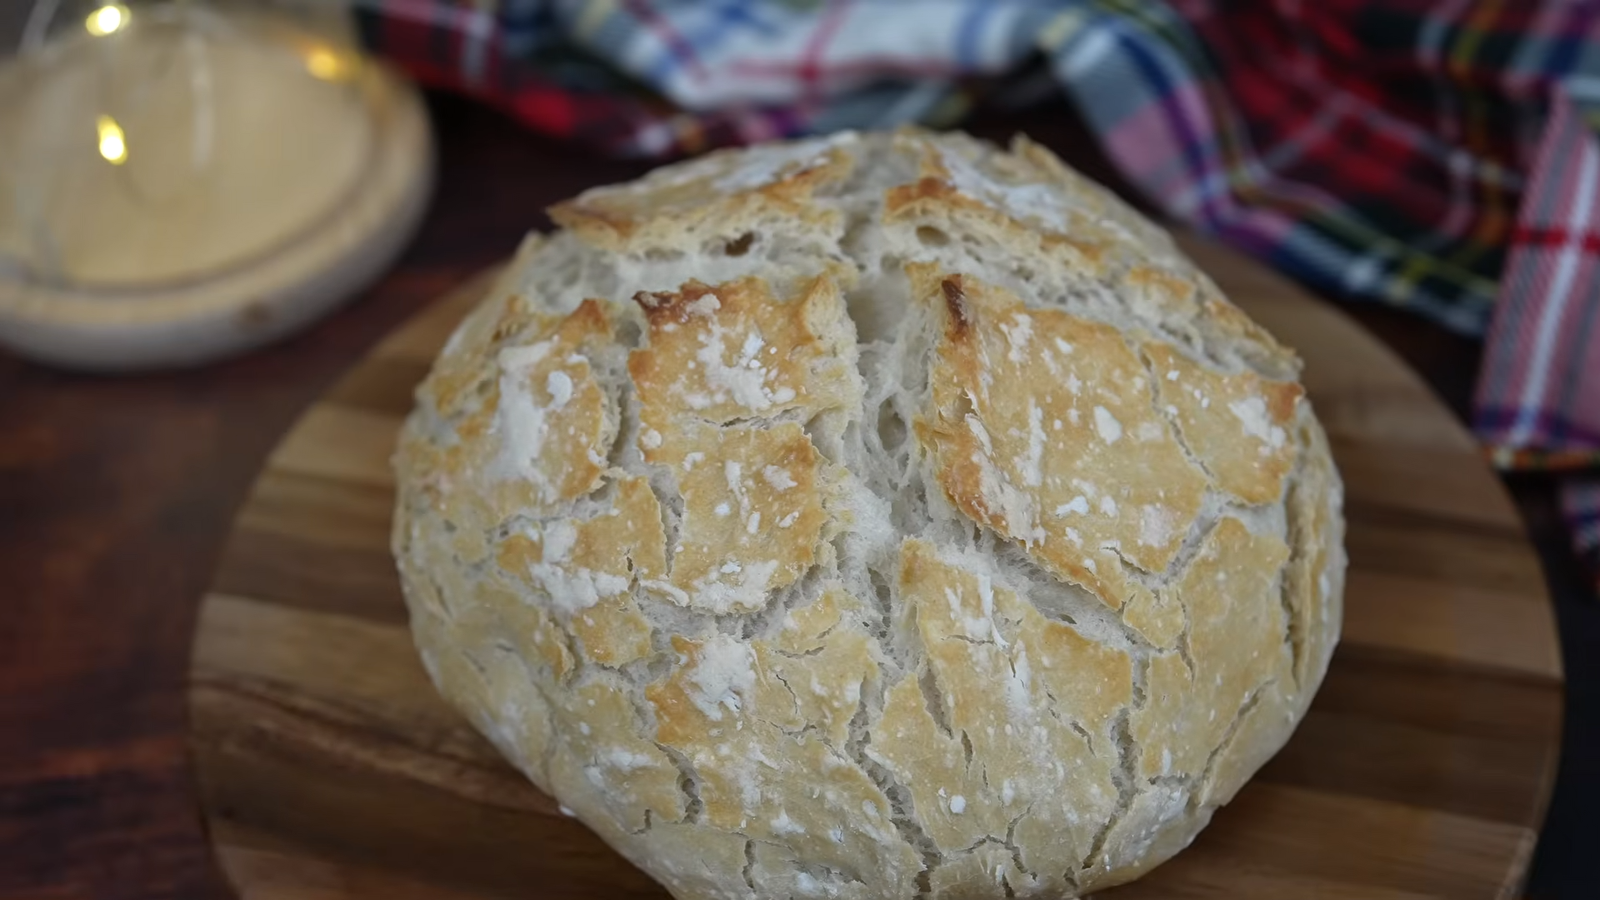
The crackly crust, the soft center, and that rustic look — I knew I had to share it.
If you’ve ever wanted to bake bread that makes people go “Wait… you made that?!” — this is it.
What Makes Dutch Oven Bread So Special
Let’s be real: baking bread can be scary. Kneading, proofing, rising — it sounds like a science experiment. But a Dutch oven makes everything easier.
Here’s the magic: when you bake bread in a Dutch oven, it traps steam inside. That steam keeps the crust soft at first, letting the bread rise beautifully. Then as it bakes longer, it turns the crust golden and crispy — just like the artisan loaves at fancy bakeries.
So even if you’ve never baked before, your Dutch oven does most of the heavy lifting. That’s why this bread is called “no-fail bread” by so many people.
Ingredients You’ll Need
You won’t believe how short this list is. No weird ingredients, no fancy tools. Just four simple things:
- 3 cups all-purpose flour
- 1½ teaspoons salt
- ½ teaspoon instant yeast
- 1½ cups warm water
That’s it. Four ingredients. You probably have them all right now.
If you want to get fancy later, you can toss in some garlic, herbs, or cheese. But for the first try, keep it simple. Trust me — even the plain version tastes amazing.
Step-by-Step: How to Make Dutch Oven Bread
Here’s the best part — no kneading, no stress. Just mix, wait, and bake.
Step 1: Mix Everything Together
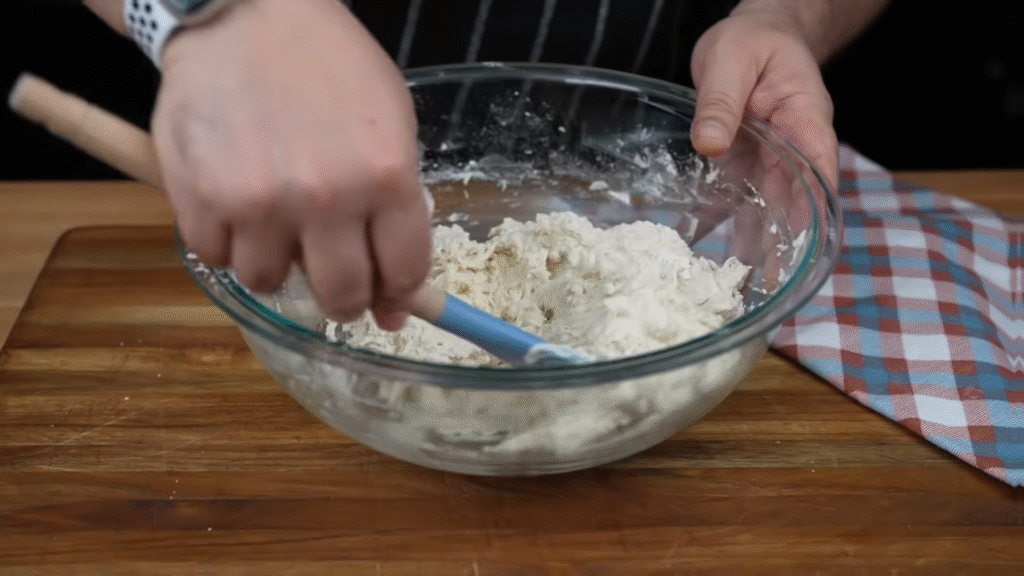
In a big bowl, mix the flour, salt, and yeast. Add warm water and stir until it forms a sticky dough. It’ll look messy — don’t panic! That’s how it’s supposed to look.
Cover the bowl with plastic wrap or a towel and leave it on the counter for 12 to 18 hours. Yep, that’s a long rest — but it’s what gives the bread its deep flavor and those amazing air pockets.
Step 2: Shape the Dough
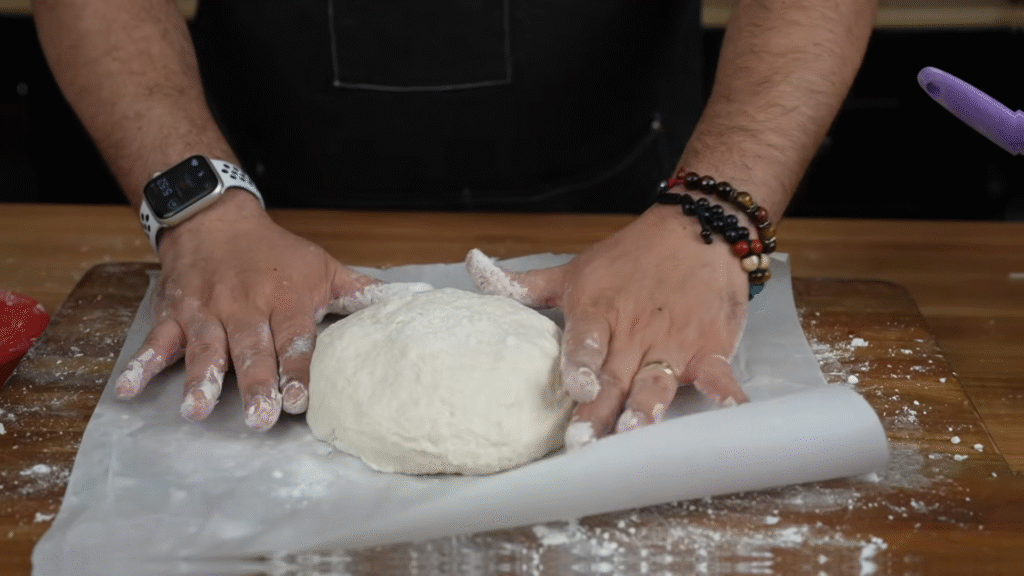
After resting, the dough will look bubbly and puffed up. Dust your hands and the counter with flour. Gently shape the dough into a ball — don’t punch it or knead it much. You want to keep all those beautiful air bubbles inside.
Let it rest again for about 30 minutes while you preheat your oven.
Step 3: Heat the Dutch Oven
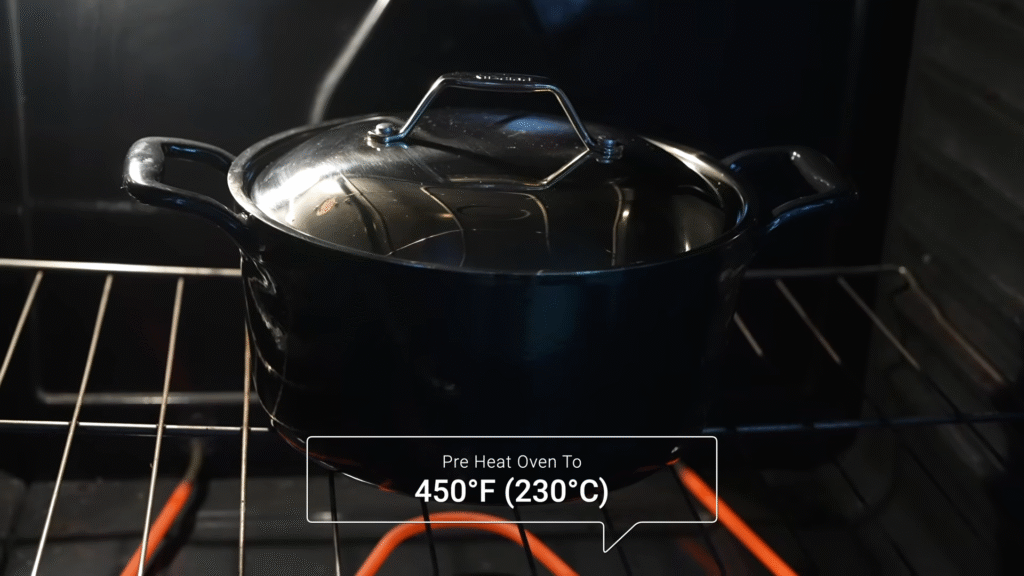
Place your Dutch oven (with the lid on) into your oven and preheat it to 450°F (230°C). Let it heat for at least 30 minutes.
A hot Dutch oven helps the dough rise fast and gives that bakery-style crust.
Step 4: Bake the Bread
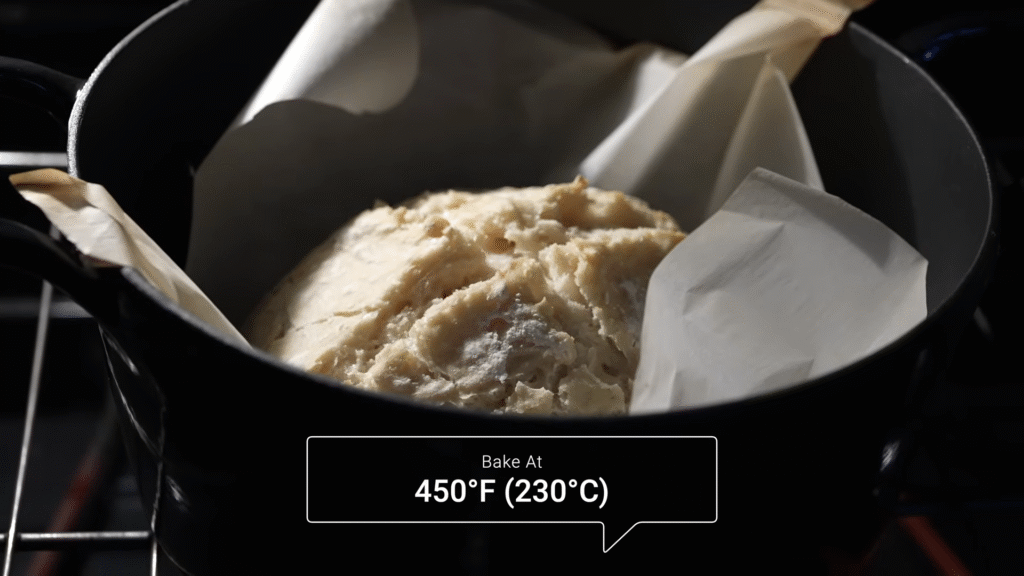
Carefully remove the Dutch oven (it’s super hot — use oven mitts). Place a piece of parchment paper with the dough inside the pot. Cover it and bake for 30 minutes.
Then, remove the lid and bake for another 10–15 minutes until the crust turns deep golden brown.
When it’s done, let the bread cool before slicing. I know it’s tempting, but waiting helps lock in that perfect texture inside.
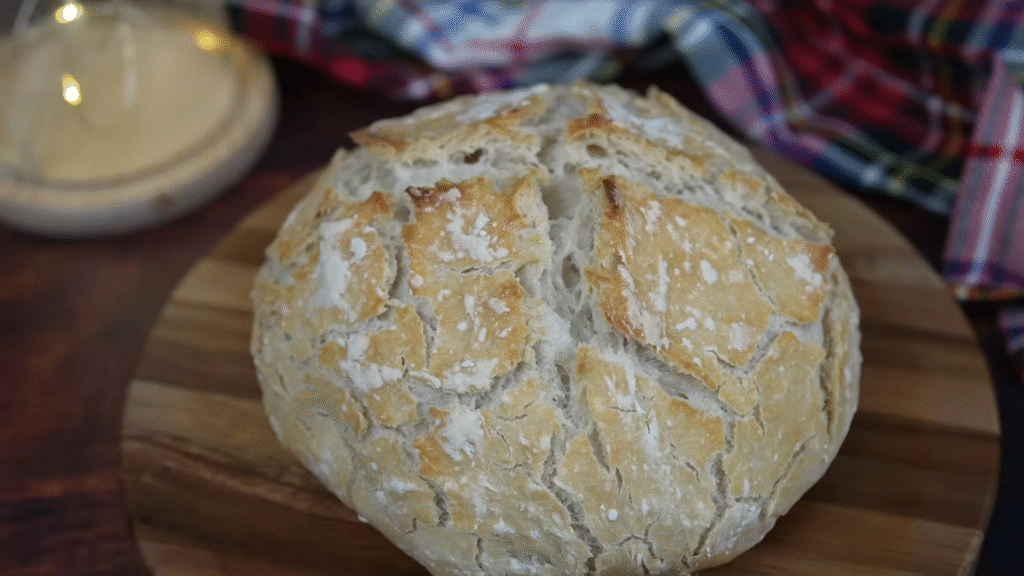
The Texture: Crispy Outside, Cloud-Soft Inside
Here’s why I love this bread — the contrast. When you slice into it, the crust cracks under your knife, and the inside is unbelievably fluffy and soft.
It’s perfect for soups, sandwiches, or even just with butter. Honestly, I’ve eaten half a loaf standing right next to the cutting board. No regrets.
The Dutch oven gives it that signature rustic shape too — every loaf looks a little different, and that’s the charm.
Why You’ll Love Making This Bread
Let me guess — you’re thinking, “I don’t have time to babysit dough all day.” But that’s the beauty of it!
Here’s why this recipe will become your go-to:
- No kneading: Just mix and let it rest.
- No stress: You can’t really mess it up.
- Crazy good crust: Like real bakery bread.
- Budget-friendly: Four ingredients — that’s it!
- Impressive results: Everyone will think you’re a pro baker.
If you’re new to baking, this bread will give you instant confidence. If you already bake, this will remind you why you fell in love with it in the first place.
Tips for Perfect Dutch Oven Bread
Here are a few little tricks I’ve learned the hard way:
- Use parchment paper. It makes lifting the dough easier and prevents sticking.
- Don’t skip the preheat. The hotter the pot, the better the crust.
- Let it cool fully. Cutting too early makes it gummy inside.
- Store it right. Wrap in a clean towel or paper bag — never plastic, or it’ll lose that crispy crust.
- Experiment! Add seeds, herbs, or even cheese once you’ve nailed the basic version.
How Long It Lasts (and How to Store It)
Fresh Dutch oven bread stays perfect for about 2–3 days at room temperature. Keep it in a paper bag or wrapped in a clean towel.
If you want to keep it longer, slice it and freeze it. When you’re ready to eat, pop a slice in the toaster or oven — it’ll taste just as fresh as day one.
Common Mistakes (And How to Avoid Them)
Even though this bread is easy, here are a few common pitfalls:
- Too much flour: The dough should be sticky. Don’t over-flour it.
- Cool Dutch oven: If it’s not hot, the bread won’t rise well.
- Cutting too soon: Wait at least 30 minutes before slicing.
- Skipping the rest time: That overnight rest is where all the flavor comes from.
Patience really does make the best loaf.
Why Dutch Oven Bread Feels So Rewarding
Every time I make this, it reminds me how something so simple can feel special. The sound of that crust crackling when it cools, the smell filling the kitchen — it’s like comfort baked into a loaf.
You don’t need to be a professional baker. You just need a Dutch oven, some patience, and a bit of curiosity.
Trust me, once you make it, you’ll never look at store-bought bread the same way again.
FAQs About Dutch Oven Bread
Q1: Can I use whole wheat flour instead of all-purpose?
Yes, but use half whole wheat and half all-purpose for the best texture. Whole wheat makes it denser, so balance is key.
Q2: What if I don’t have a Dutch oven?
You can use any oven-safe pot with a tight lid. Even a deep casserole dish works!
Q3: How can I add flavors?
Try mixing in chopped garlic, herbs, shredded cheese, or nuts after the first mix. Just don’t overload the dough.
Q4: Can I make it gluten-free?
Yes, but you’ll need a good gluten-free flour blend made for baking. The texture will be slightly different but still tasty.
Q5: Why did my crust turn too dark?
Your oven might run hot — reduce the temperature by 10–15°F next time or shorten the lid-off baking time.
Final Thought:
Once you try this Dutch oven bread, you’ll feel like you’ve unlocked a secret baking power. Every loaf is a little different, but every one is delicious.
Now go preheat that oven — you’re about to make something truly special.