Pickles aren’t just cucumbers taking a spa day in vinegar. They’re sharp, tangy, crunchy little flavor bombs that can turn a plain sandwich into something worth bragging about. And when it comes to pickles, dill pickles reign supreme. That garlicky, herby, salty-sour punch is irresistible.
If you’ve ever wanted to make your own, you’re in for a treat. Homemade dill pickles aren’t just tastier than store-bought, they’re also customizable—your crunch, your brine, your flavor.
Let’s roll up our sleeves and dive deep into the art (and science) of making dill pickles.
Why Dill Pickles Are Worth Making at Home
Store-bought pickles often contain preservatives, food dyes, and an uneven crunch that makes you wonder if they sat in a jar since the last decade. Homemade dill pickles, on the other hand, can be as crisp, fresh, and garlicky as you like.
Here’s why making them at home pays off:
- Better flavor control – More garlic? Extra dill? Less salt? Your rules.
- Fresher crunch – With the right technique, your cucumbers stay snappy instead of rubbery.
- Cost-effective – A single batch can save you up to 40% compared to premium store-bought pickles.
- Healthier – No artificial colors, no chemical preservatives—just pure briny goodness.
And let’s not forget—there’s a weird pride that comes from telling someone, “Oh, these pickles? Yeah, I made them.” It feels like unlocking a culinary superpower.
Choosing the Right Cucumbers for Dill Pickles
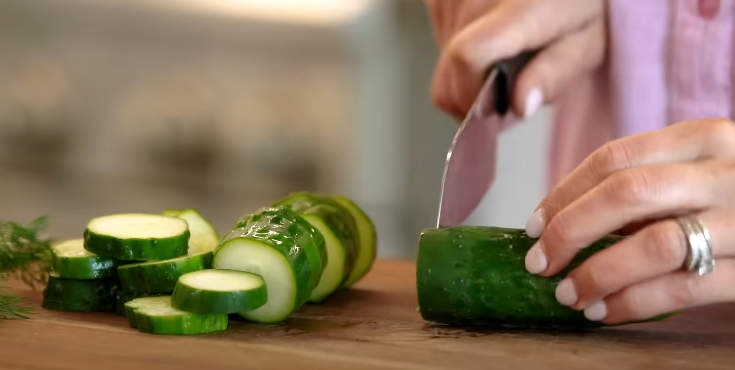
Not all cucumbers are pickle-worthy. The big watery ones from the supermarket are better suited for salads, not brining. For pickles, you want pickling cucumbers—sometimes called Kirby cucumbers.
Why pickling cucumbers?
- Smaller size – Usually 3–5 inches, perfect for fitting into jars.
- Thin skin – Absorbs brine faster.
- Firm flesh – Holds crunch during fermentation or pickling.
Pro tip: Avoid cucumbers with wax coating (common in grocery stores) because the brine won’t penetrate well. Farmers’ markets and local produce stands are your best bet.
Essential Ingredients for the Perfect Dill Pickle
Making dill pickles is like chemistry in your kitchen. Each ingredient has a role to play.
- Cucumbers – The star. Choose fresh, firm ones.
- Dill – Fresh dill heads are ideal, but dill seeds work in a pinch.
- Garlic – For that classic sharp bite.
- Salt – Use pickling or kosher salt; avoid iodized table salt (it clouds the brine).
- Vinegar – White vinegar gives a sharp flavor; apple cider vinegar adds a subtle sweetness.
- Water – Filtered is best (chlorine can affect fermentation).
- Spices (optional but magical) – Mustard seeds, peppercorns, red pepper flakes, coriander seeds.
The beauty here is customization. Want your pickles spicier? Add jalapeño slices or extra chili flakes. Prefer a softer tang? Cut vinegar with more water.
Quick Pickles vs. Fermented Pickles
Before you dive in, let’s settle this: there are two main pickle paths—quick pickles and fermented pickles.
Quick Pickles (Refrigerator Pickles)
- Made by pouring hot vinegar brine over cucumbers.
- Ready to eat in 24–48 hours.
- Stay crisp and bright green.
- Last 4–6 weeks in the fridge.
Fermented Pickles (Traditional Dill Pickles)
- Made by submerging cucumbers in saltwater brine.
- Naturally ferment with wild bacteria.
- Develop deeper, more complex flavor.
- Ready in 1–4 weeks depending on temperature.
- Last months in the fridge.
If you’re impatient (like me when I first started), go with quick pickles. If you want that old-school deli-style sour tang, go for fermentation.
Step-by-Step Guide: Quick Dill Pickles
These are your weeknight heroes—done in under 30 minutes, ready to eat in a day.
Ingredients (for 1 quart jar)
- 4–5 small cucumbers
- 1 cup water
- 1 cup white vinegar
- 1 tablespoon pickling salt
- 2 garlic cloves, smashed
- 1 teaspoon mustard seeds
- ½ teaspoon peppercorns
- 1 bunch fresh dill
Instructions
- Prepare cucumbers – Wash and slice into spears, rounds, or keep whole.
- Sterilize jar – Boil it in water for a few minutes. (Keeps pickles fresh longer.)
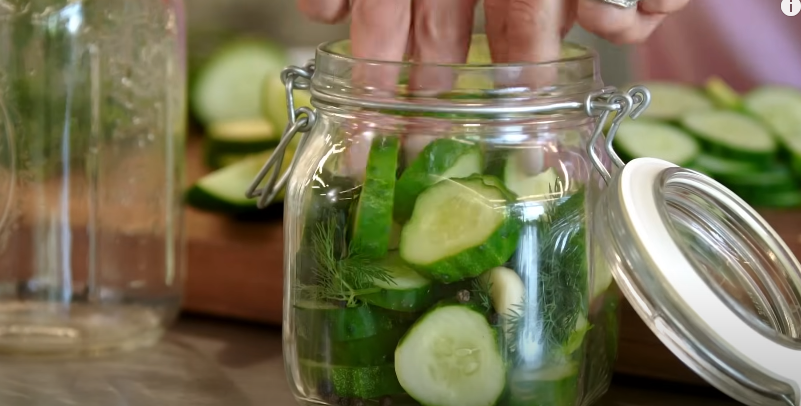
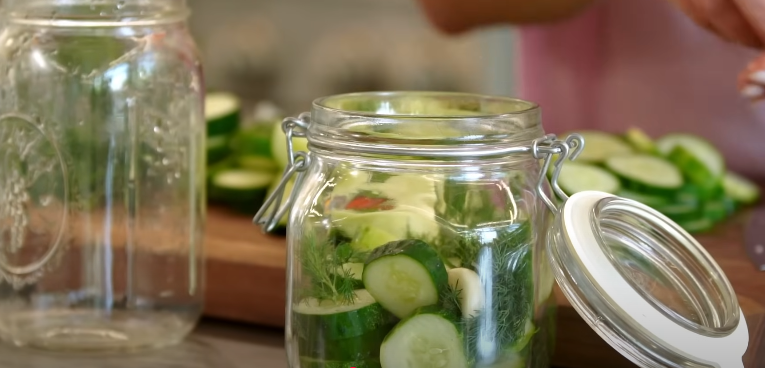
- Add flavor base – Toss dill, garlic, mustard seeds, and peppercorns into the jar.
- Pack cucumbers – Stuff cucumbers tightly into the jar without crushing them.
- Make brine – In a saucepan, combine water, vinegar, and salt. Bring to a boil, then pour over cucumbers.
- Cool & seal – Let the jar cool at room temp, then refrigerate.
By the next day, you’ll have pickles worthy of any deli sandwich.
Step-by-Step Guide: Fermented Dill Pickles
This is where things get exciting. Fermentation uses natural bacteria to develop that deep sour bite.
Ingredients (for 1 half-gallon jar)
- 2 pounds pickling cucumbers
- 2 tablespoons kosher salt
- 4 cups water (filtered)
- 5–6 garlic cloves
- 2–3 dill heads (or 3 tablespoons dill seeds)
- 1 teaspoon mustard seeds
- 1 teaspoon coriander seeds
- ½ teaspoon red pepper flakes
Instructions
- Make brine – Dissolve salt in water.
- Pack jar – Add cucumbers, garlic, dill, and spices.
- Add brine – Pour until cucumbers are fully submerged. Weigh them down with a fermentation weight or a smaller jar.
- Cover loosely – Use a lid or cloth to allow gases to escape.
- Ferment – Store at room temperature (65–75°F). Taste after 3–4 days. When flavor is to your liking, refrigerate.
Fermented pickles develop a cloudy brine and a tang that vinegar-based pickles can’t match.
How to Keep Dill Pickles Crispy
Nobody likes a floppy pickle. Here’s how to guarantee crunch:
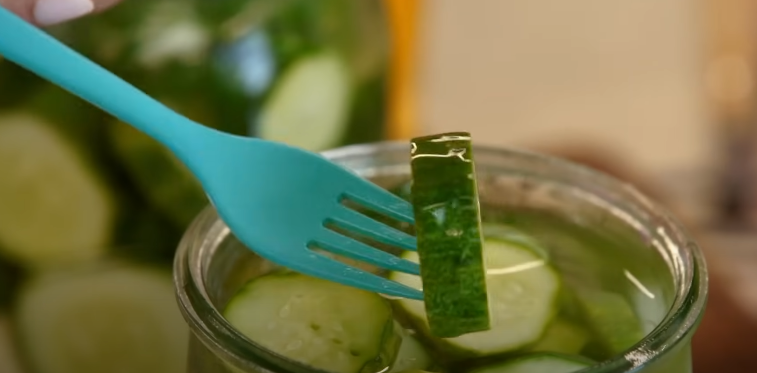
- Use fresh cucumbers – The fresher, the crunchier.
- Add tannins – Toss in a grape leaf, oak leaf, or black tea bag. The tannins help keep cucumbers firm.
- Don’t overheat – If making quick pickles, don’t boil cucumbers—just pour hot brine over them.
- Cool storage – Keep fermented pickles in the fridge once they’re ready.
Fun fact: In blind taste tests, over 70% of people said texture mattered more than flavor when judging a pickle. Crunch rules.
Creative Variations of Dill Pickles
While classic dill pickles are unbeatable, experimenting keeps things fun:
- Spicy Dill Pickles – Add sliced jalapeños or dried chilies.
- Garlic-Dill Pickles – Double the garlic cloves.
- Sweet Dill Pickles – Add 2–3 tablespoons sugar to your brine for a tangy-sweet combo.
- Bread-and-Butter Dill Pickles – Toss in sliced onions and mustard seeds for a sweeter, old-fashioned twist.
- Asian-Inspired Dill Pickles – Add ginger slices, sesame seeds, or rice vinegar.
Think of your pickle jar as a blank canvas. Once you know the basics, flavor possibilities are endless.
Dill Pickles in Everyday Cooking
Pickles aren’t just sandwich sidekicks—they’re versatile ingredients:
- Chop them into potato salad for tang.
- Dice them into tartar sauce for fried fish.
- Toss into chicken salad for crunch.
- Add to burgers and wraps for instant zing.
- Blend into a pickle dip with sour cream and dill.
And here’s a pro move: save the pickle juice. It makes a killer marinade for chicken, a base for salad dressing, or even a post-workout electrolyte drink (yes, athletes actually swear by it).
Storing and Shelf Life
- Quick pickles – Best eaten within 4–6 weeks.
- Fermented pickles – Can last 6 months or more in the fridge.
- Signs of spoilage – Slimy texture, off smell, mold growth. (Cloudy brine is normal for fermented pickles, not for quick pickles.)
Always refrigerate once opened, and keep cucumbers submerged in brine to avoid spoilage.
The Pickle Tradition Around the World
Pickles aren’t just American deli staples. Nearly every culture has its own spin:
- Korean kimchi – Spicy, fermented napa cabbage.
- Indian achar – Pickled mangoes, limes, or chili peppers in oil and spices.
- Japanese tsukemono – Lightly pickled vegetables served with rice.
- Eastern European sauerkraut – Fermented cabbage, often eaten with sausages.
Your homemade dill pickles are part of this massive global pickling tradition—proof that humans everywhere love preserving crunch and flavor.
Final Thoughts
Making dill pickles isn’t just a recipe—it’s a little science, a little art, and a lot of satisfaction. Once you start making your own, you’ll never go back to bland store-bought jars.
You control the salt, the garlic punch, the heat, the sweetness. And when you bite into that crisp, tangy spear you made with your own hands, trust me—you’ll feel like you’ve bottled up a piece of summer to enjoy all year long.
Now grab some cucumbers, dill, and a jar—you’re officially on your way to becoming the person who always shows up at cookouts with “the good pickles.”


