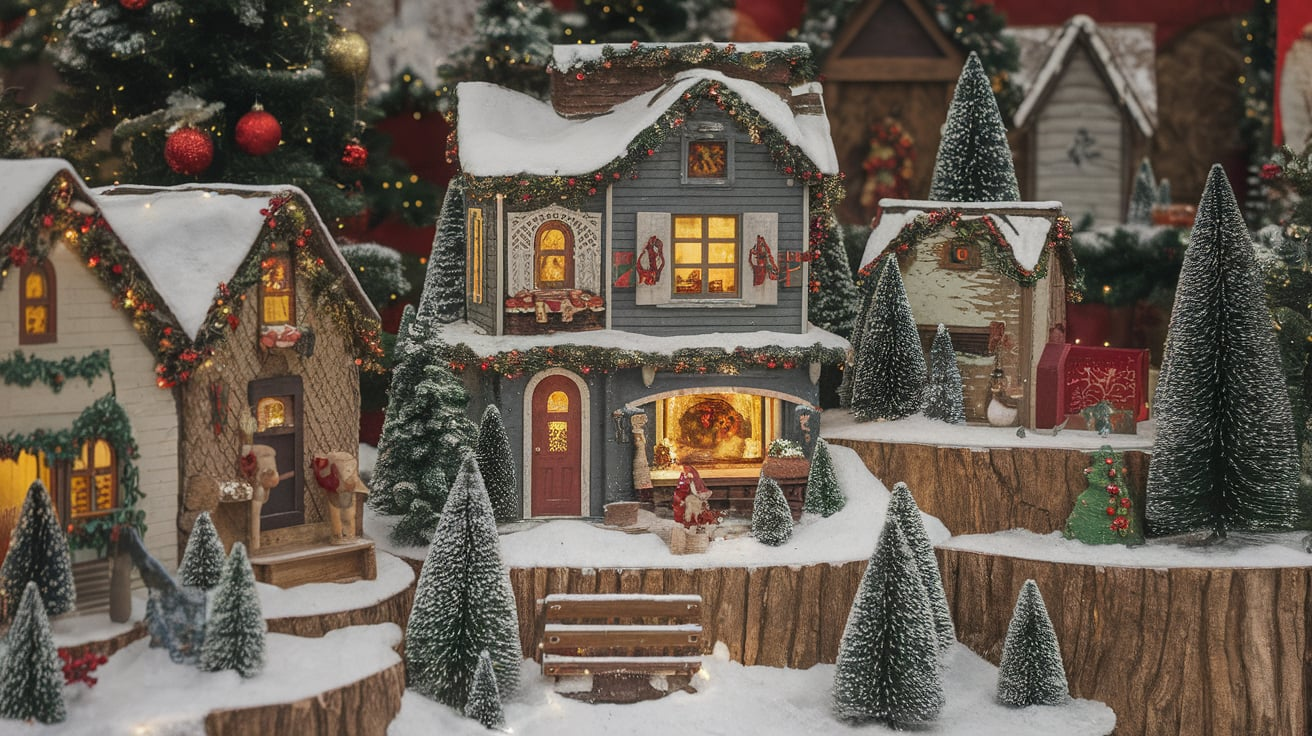
When I was little, I used to stare at those tiny glowing Christmas villages inside store windows — the snow, the lights, the tiny people skating — it felt like a dream.
Years later, I decided to make my own Christmas village at home. And oh, what a joy it was! If you love cozy Christmas vibes, twinkling lights, and creativity, you’re in for a treat.
Here are 23 Christmas village display ideas that’ll help you build your own magical winter wonderland — right on your table, shelf, or even under your tree.
1. Classic Snowy Village
Start with the most timeless idea — a snowy village with white cotton or fake snow. Use simple ceramic houses, sprinkle snow powder, and let warm fairy lights peek through windows. It feels peaceful and cozy, like a scene from an old Christmas movie.
2. Tiered Tray Display
Got a tiered tray? Perfect. Create mini levels of Christmas joy using bottle brush trees, tiny reindeer, and miniature houses. It’s great for small spaces and adds that festive charm right on your kitchen counter.
3. Under-the-Tree Wonderland
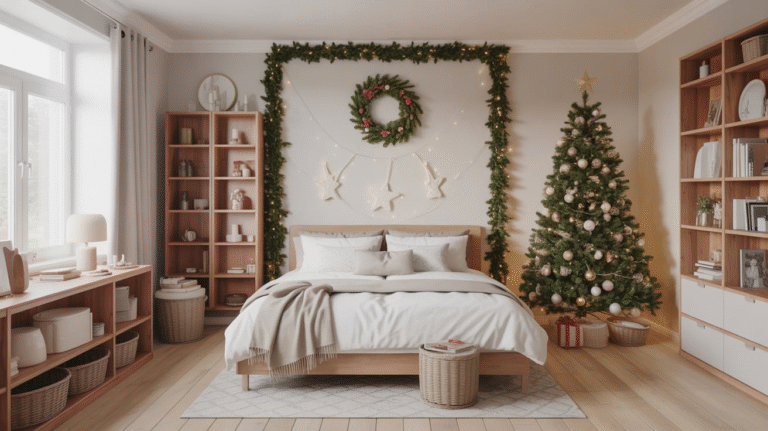
One of my favorites — make your village around the base of your Christmas tree. Add twinkling lights and a train track circling the houses. It brings life to the space under your tree and looks magical when gifts are added later.
4. Window Sill Glow
Turn your window sill into a glowing Christmas village. As the outside gets darker, your little houses will shine beautifully against the glass. I love how it makes your home look festive from both inside and out.
5. Bookshelf Magic
If you’ve got a bookshelf, use it as a multi-level Christmas town. Mix books, garlands, and tiny figurines to create layers of holiday scenes. Each shelf can tell a different story — from skating ponds to cozy cottages.
6. Mirror Base Display
Here’s a trick I learned — place a mirror under your village. It makes the snow look doubled and gives your display a beautiful reflection, especially with lights. It’s simple but looks like something out of a designer catalog.
7. Rustic Wooden Board Village
If you love farmhouse style, build your village on a wooden board or crate. Add some pinecones, twigs, and natural textures. It gives a warm, rustic look that pairs perfectly with neutral Christmas decor.
8. Floating Shelf Scene
Got wall shelves? Line them with mini village houses and fairy lights. It’s a great space-saver, and your guests will love spotting the tiny details every time they walk by.
9. Mason Jar Mini Village
This one’s adorable. Fill mason jars with fake snow, a small house, and a tree inside. When you line them up, it looks like a glowing village inside glass bubbles. Plus, it’s easy to make and kid-friendly.
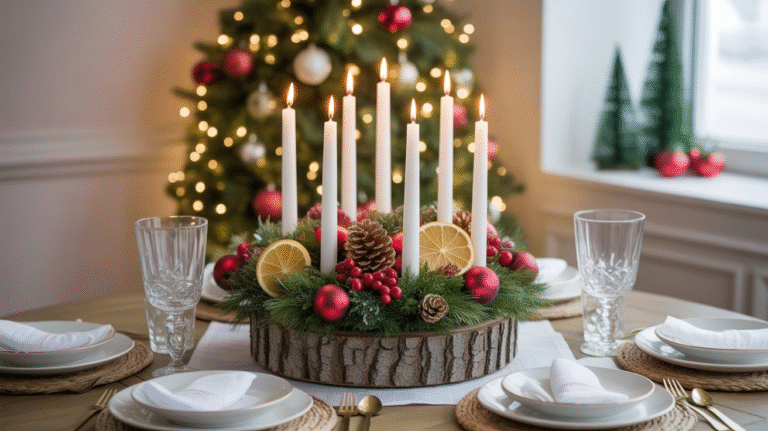
10. Cake Stand Christmas Village
Use a cake stand as a 360-degree display platform. Layer it with fake snow and small figurines. It’s easy to move and looks elegant as a centerpiece on your dining table.
11. Ladder Display Village
Take an old ladder and turn it into vertical Christmas art. Decorate each step with houses, garlands, and twinkle lights. It’s a fun DIY that instantly becomes a statement piece.
12. Mirror Fireplace Mantel
If you have a mantel, use it! Add tiny houses, twinkling lights, and greenery. I love using mirrors behind them — they reflect the light and make your display feel twice as big.
13. Wooden Slice Base
Use wood slices as individual village platforms. Add a house, tree, and snow on each slice. Arrange them together for a scattered but charming woodland effect.
14. Glass Dome Village
Create a mini snow globe effect using glass domes or cloches. Place a little house and snow inside, then light it up with a small LED candle. It’s elegant and makes great table decor.
15. DIY Cardboard Village
Don’t have fancy village houses? No problem. Cut and paint your own cardboard houses, sprinkle glitter on the roofs, and you’ve got yourself a budget-friendly yet heartwarming display.
16. Vintage Toy Village
Use your old toy cars, trains, or dolls to bring your village to life. It adds personality and nostalgia — a perfect touch if you want your decor to tell a story.
17. Candlelit Cozy Village
If you like soft light, surround your village with battery candles or LED tealights. The warm glow makes everything feel calm and magical — especially at night.
18. Outdoor Porch Village
Yes, you can take your creativity outside! Use weather-proof houses and lanterns on your porch or garden table. When the snow falls, it looks like a real-life Christmas storybook scene.
19. Table Centerpiece Village
If you’re hosting dinner, create a mini village in the center of your table. Keep it low and simple so guests can still talk across it. Add candles for that cozy dinner glow.
20. Train Track Village
Kids love this one — build a village around a small train track. Let the train move through tunnels and bridges surrounded by snow. It’s interactive and always a big hit.
21. Wall Frame Village
Here’s something creative — turn an old photo frame into a mini shadow-box village. Add small houses inside, sprinkle snow, and hang it like a 3D artwork. It’s unique and classy.
22. Kitchen Counter Display
Add a small village corner in your kitchen. Use battery lights instead of plug-ins for safety. It makes baking cookies even more festive when a little snowy scene is glowing nearby.
23. Tiered Box Display
Stack boxes or wooden crates of different sizes and create layers of your Christmas village. Drape fairy lights and greenery across. It adds height and looks beautiful in any corner of the room.
Final Thoughts
Creating a Christmas village isn’t just about decoration — it’s about building a tiny world filled with joy, lights, and imagination. Every little house, every flickering light tells a story. When I finish setting mine up and turn off the room lights, it always feels like stepping into a warm, happy dream.
Whether you go big or small, simple or detailed — your Christmas village will bring that magical glow to your home. Start with what you have, add a little creativity, and let the holiday spirit guide your hands.